Multi Room Audio - part II
16 Mar 2019In part I, I covered the planning (cough..) and design goals for my multi-room audio system. Part II goes into most of the detail of how I ended up building it.
Pooooowwwwwweeeeerrrr!!!!!
My player units - the IQaudIO and RasPi combo machines - needed power. The RasPi normally takes a 5V USB-B supply but the DigiAmp+ needs more than that and IQaudIO was recommending 19v power bricks like the kind you get with laptops. They would each have dwarfed the combined size of the Pi/DigiAmp+ combo that it was powering and they cost £24 a piece, so I certainly wasn’t happy with getting one of those for each player. What I needed was some way to split the power from the brick to all my units so that I only needed one power brick, and not five.
 Amazon (let’s just take it as read that everything came from there because apart from the DigiAmps it probably did) had one of these, but with 5 outputs rather than the 9 shown. They don’t seem to have the 5-way splitter images for some reason. This is clearly designed for one of the aforementioned power bricks where you plug the single female end of the cable into the output lead from the brick and can then power 5 (or 9 or whatever) units from the one source, but there was a problem. The power bricks were only rated for 3.4amp and as far as I could tell from the manufacturer blurb, the players with DigiAmp+ and Pi combo might draw up to 3amp each. So I thought I needed something that could supply a minimum of 15amp at anywhere from 12-24v which was the voltage range specified by IQaudIO. Thinking back now though, that seems like an awful lot and I probably both mis-understood and mis-calculated this figure.
Anyhow, I bought this one 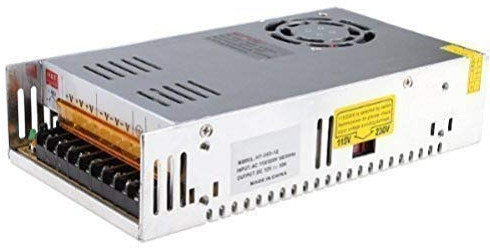 for £17 which specified 30a @ 12v. But although it states 12v output, it can actually be adjusted with a small screw at the side of the DC outputs and my meter measured closer to 14v when turned to its maximum. So that’s where I left it as it seemed more comfortably within the stated required input range for the DigiAmp+. Even if I grossly over-estimated the power draw, the transformer was still a £7 saving over the power brick so I felt like I was winning either way.
Around this time it also dawned on me that I was implicitly making fundamental design choices that could have better been considered at the outset during my (lack of) planning phase. A single transformer handling power for all the players meant co-locating the players, likely some way remote from the speakers. It also didn’t help powering devices that wouldn’t have passive speakers attached, such as my lounge sound bar as that Pi would be using normal USB power and HDMI out. But I ploughed on regardless.
Ready Player One
Time, finally, to set a couple of machines up, connect a player to some speakers and see what happens.
Software Install
Images are downloaded from max2play. You can get dedicated software for transferring OS images onto the cards that the Pi’s use, but since I only run Linux on my own machines, a simple dd of=/dev/sde if=/path/to/max2play.img or similar works fine with the card inserted into the PC with a USB card reader.
I pre-configured a couple of the files such as the /boot/config.txt and /etc/hostname in order to set the IQaudIO and player name up from first boot, but the max2play configuration screens can also do this via the web browser. My preference was also to setup SSH differently so that I could login with a key and have passwords disabled. Additionally, I resized partitions prior to putting the card into the Pi, but I think this will happen automagically thanks to max2play if you don’t do that either.
With two cards completed, I could add one to a Pi (without the DigiAmp+ board) to use as the Squeezebox server, and one to the first player (Pi plus DigiAmp+). The server was added to a small rack of Pis that I have, plugged into the network switch and powered on. It booted quickly and after about 5 minutes setup I’d got it configured as a server and mounting my music directory over NFS.
Player
Next I needed to cut the end of the power splitter and strip the cable so that it could be attached to the transformer. The core of the cable was extremely thin and I was a bit concerned about whether it should be used to split 5 ways, but it would do for now for the prototype player. After attaching mains input and the severed splitter lead to one of the DC output terminal pairs, I checked that 14v DC was being read from each of the 5 barrel connectors, and with the right polarity for the IQaudIO board. Thankfully it was.
Nothing left to do but plug one of them into my player and see whether pretty lights came on or if something went BANG.
Aaaargh - the barrel connector on the cable didn’t fit the input on the IQaudIO DigiAmp+. The cable was a 2.1mm diameter and the board needed 2.5. Disaster. Luckily there are some converters for that but now I had to wait for those to arrive to see if that would fix it…
It works!
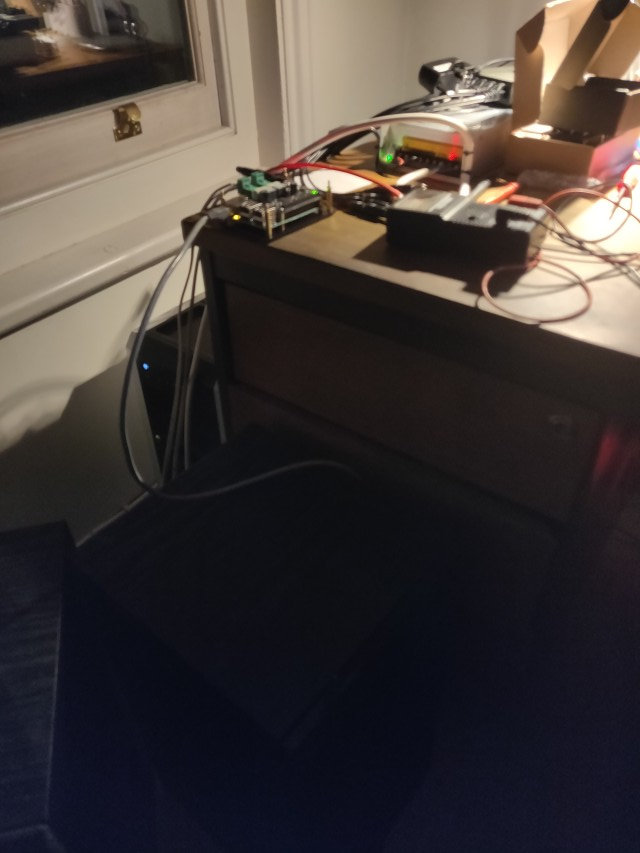
As my badly blurred photo almost shows, the player on the corner of the desk has power from the transformer, networking and is using some old spare speaker wire to attach to a pair of Mission speakers. The player was instantly recognised by the server and so I could use the LMS web interface to select the player and output some music to it, which it played first time. Awesome!
So far, so good. It was time to start thinking about how this would work for real.